 PeekLUT
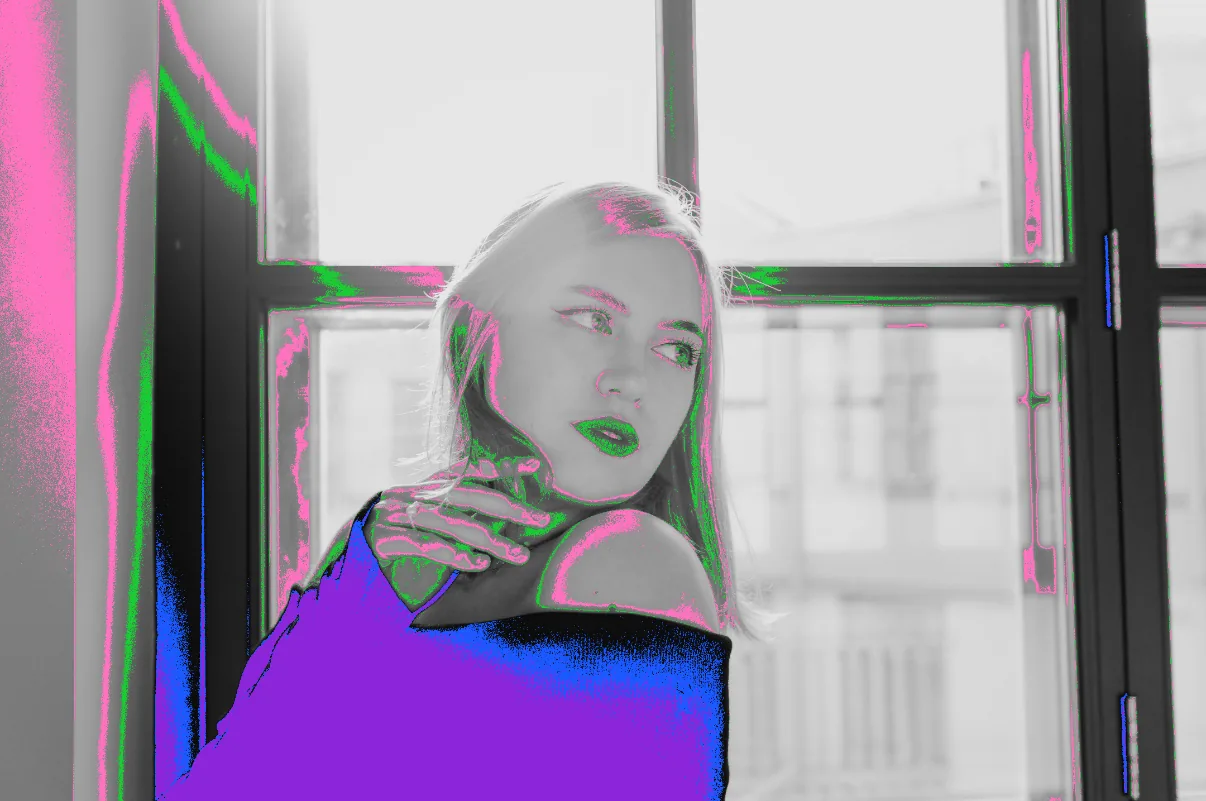
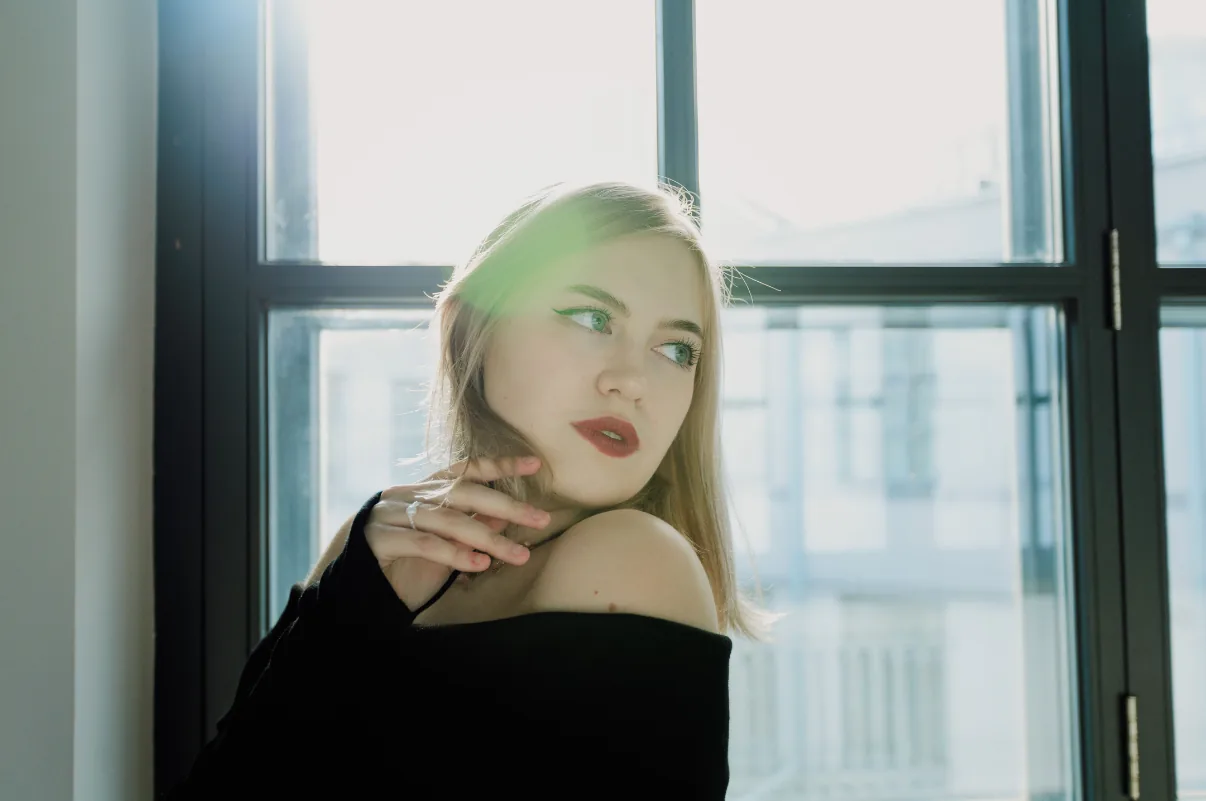
To check exposure on iPhone with false color and zebras, open a photo or video in PeekLUT, tap the scopes button at the top right of the preview, and choose False Color or Zebras under Exposure. False color repaints the image by brightness, so crushed shadows, mid gray and clipped highlights each show up as their own color. Zebras draw stripes over anything brighter than the level you pick.
Both tools only change the preview. Your photos, videos and exports are never affected, so you can leave them on while you grade and turn them off when you want to judge the look.
Why judge exposure with a tool instead of your eyes
Phone screens are bright, and they change with the room. The same frame can look fine at night and dark in daylight. Exposure tools read the actual values in the image, so they give the same answer on any screen.
They also answer questions a normal preview cannot. Is that white shirt clipped or just bright? Is there still detail in the black jacket? Is the face sitting where faces usually sit? False color and zebras show it at a glance.
Turn on false color and zebras
Tap the scopes button, the small bar chart at the top right of the preview. Under Exposure you will find False Color, Zebras and How It Works.
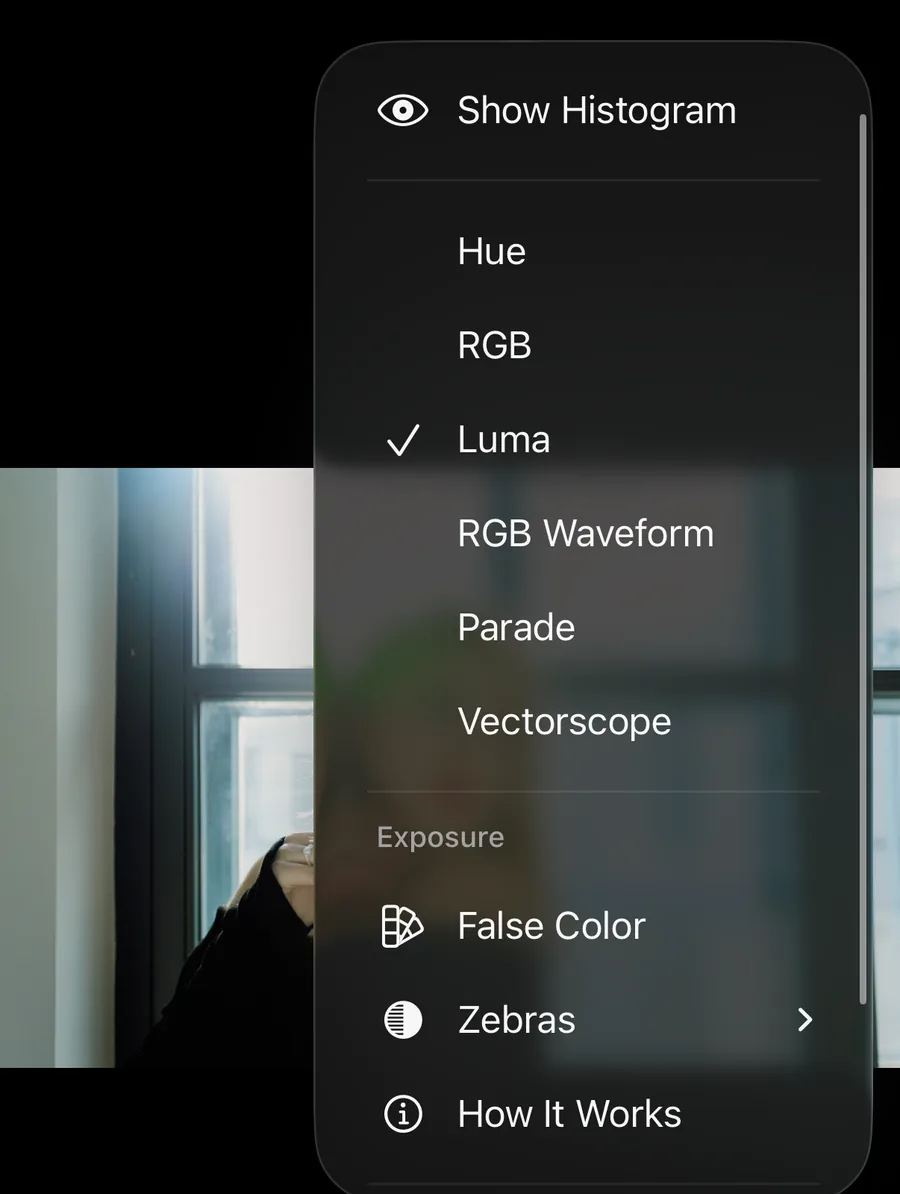
The exposure tools live in the same menu as the scopes.
When false color is on, a key appears above the preview so you never have to remember what each color means. Tap the info button beside it for a full explanation.

How to read false color
False color keeps most of the image in gray and only colors a few important brightness bands. The percentages match PeekLUT's Luma waveform, where 0% is black and 100% is white.
| Color | Name | Range | What it means |
|---|---|---|---|
| Purple | Crushed | 0–2.5% | Shadows with no detail left. |
| Blue | Near Black | 2.5–4% | Shadow detail is about to disappear. |
| Green | Mid Gray | 38–42% | Where an 18% gray card lands in standard video. A reliable anchor for exposure. |
| Pink | +1 Stop | 52–56% | About one stop brighter than mid gray. |
| Yellow | Near Clip | 97–99% | Highlights about to lose detail. |
| Red | Clipped | 99% and above | At white. Highlight detail is lost. |
Everything outside these bands shows as plain gray, from dark to light.
In the portrait at the top, the black sweater is mostly purple: it has no shadow detail left. That might be fine for a black garment, or it might be a sign to lift the shadows. Patches of the face fall in green and pink, which is a comfortable place for a face in soft window light. The window behind her is bright gray, not yellow or red, so it is not clipped.
Skin tones vary with complexion and lighting. Use the bands as a guide, not a target. A darker skin tone sitting below mid gray can be exactly right.
How to use zebras
Zebras do one job: they draw diagonal stripes over anything at or above the level you choose. Pick the level from the Zebras submenu.
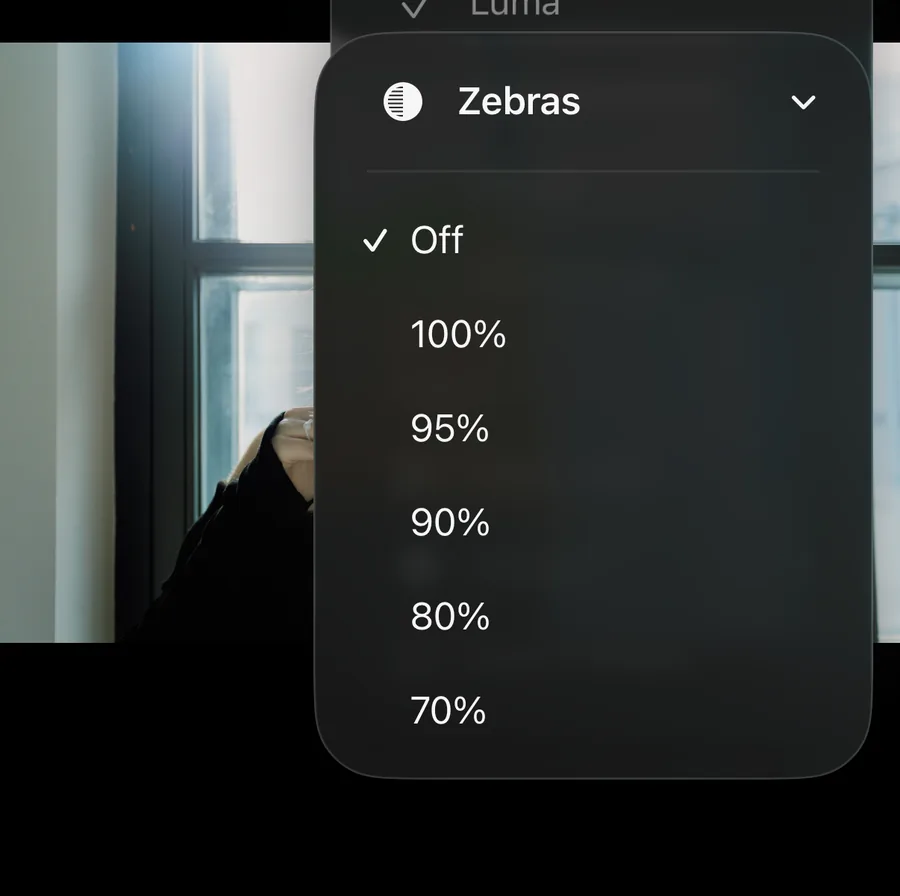
- 100% finds highlights that are clipped to white.
- 95% and 90% show bright areas just before they clip.
- 80% and 70% are useful for finding the brightest parts of a scene, such as bright skin or a lit wall.
At 90%, only the glow behind her head is striped. Raise exposure by 20% and the stripes spread across the whole window: that part of the frame is now close to clipping.
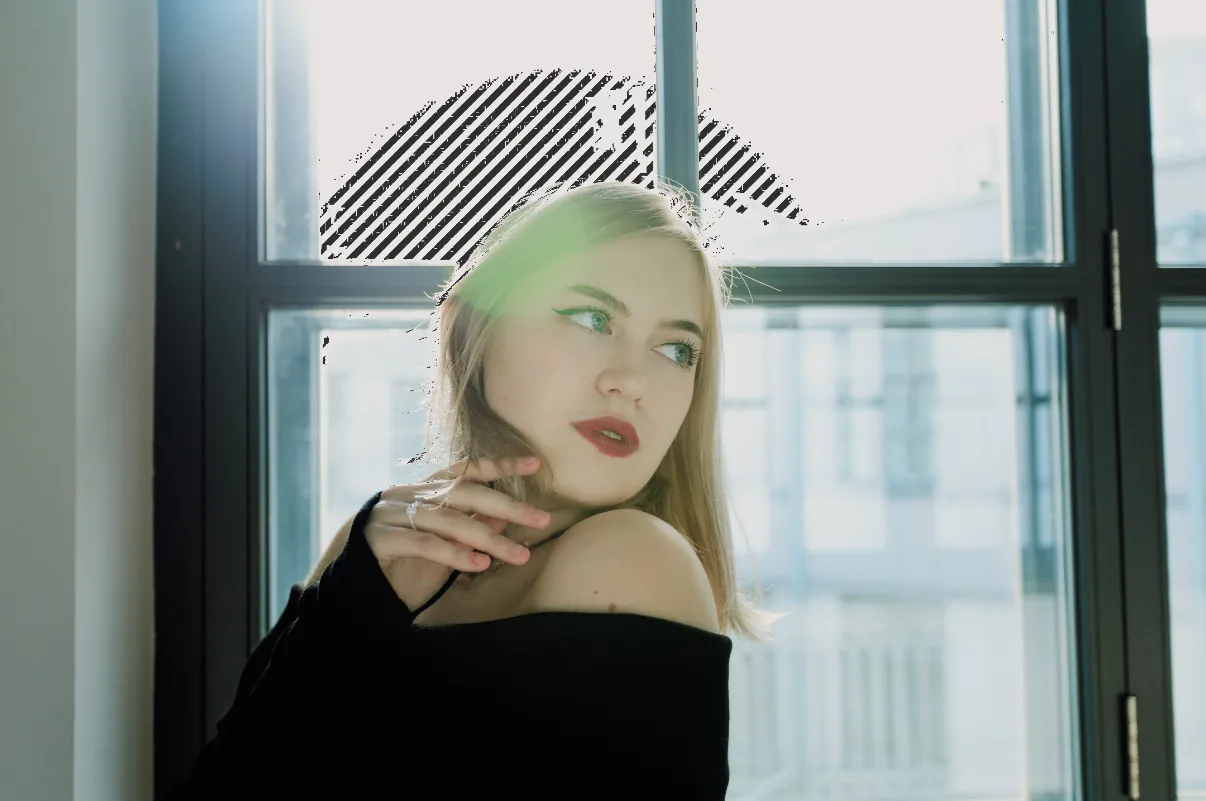
Zebras at 90%, original exposure.
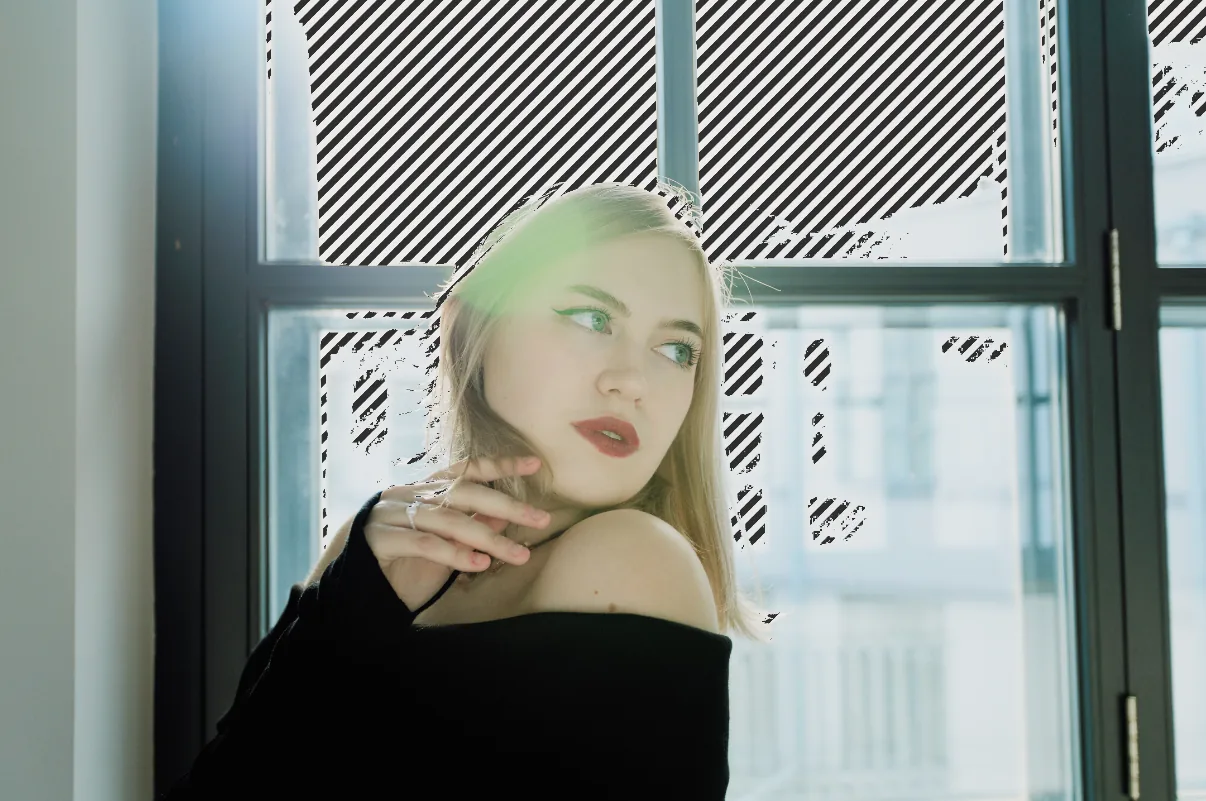
Zebras at 90% after raising exposure by 20%. The window is now close to white.
PeekLUT remembers the zebra level you chose, so it is ready the next time you turn zebras on.
A quick exposure workflow
- Turn on false color before you touch any slider.
- Find the subject. Check where the face or main subject sits. Nudge Exposure until it lands where you want it.
- Check the shadows. Purple means no detail. Decide whether that is a deliberate black or a mistake.
- Switch to zebras at 100%. Anything striped is clipped. Bring exposure down or use highlight controls if those areas matter.
- Turn both off and grade the look with a clean preview.
For log footage, convert it before reading false color. The bands describe a normal Rec.709 image, so a flat log preview will read low everywhere. Set the Color Space Transform first.
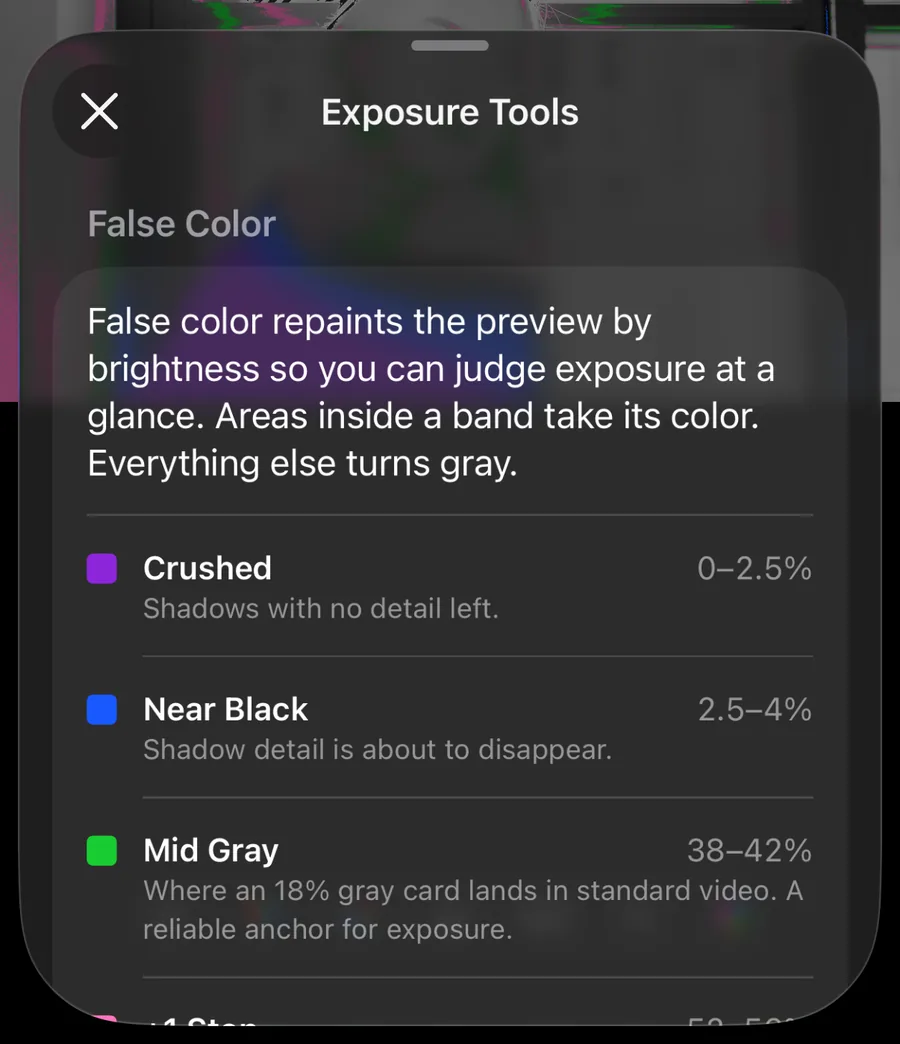
How It Works explains every band inside the app.
Frequently asked questions
Can I see false color on iPhone?
Yes. PeekLUT has false color and zebras in its editor, for both photos and video.
Do false color and zebras change my export?
No. They only change the preview. Photos, videos and exports are never affected.
What zebra level should I use?
Use 100% to find clipped highlights. Use 90% or 95% when you want a warning before anything clips.
Do the exposure tools work on video?
Yes. False color and zebras follow playback, so you can check exposure across a whole clip.
For the full grading order, from exposure to finishing, see the iPhone color grading guide.
Sample photo by Daniil Kondrashin on Pexels.